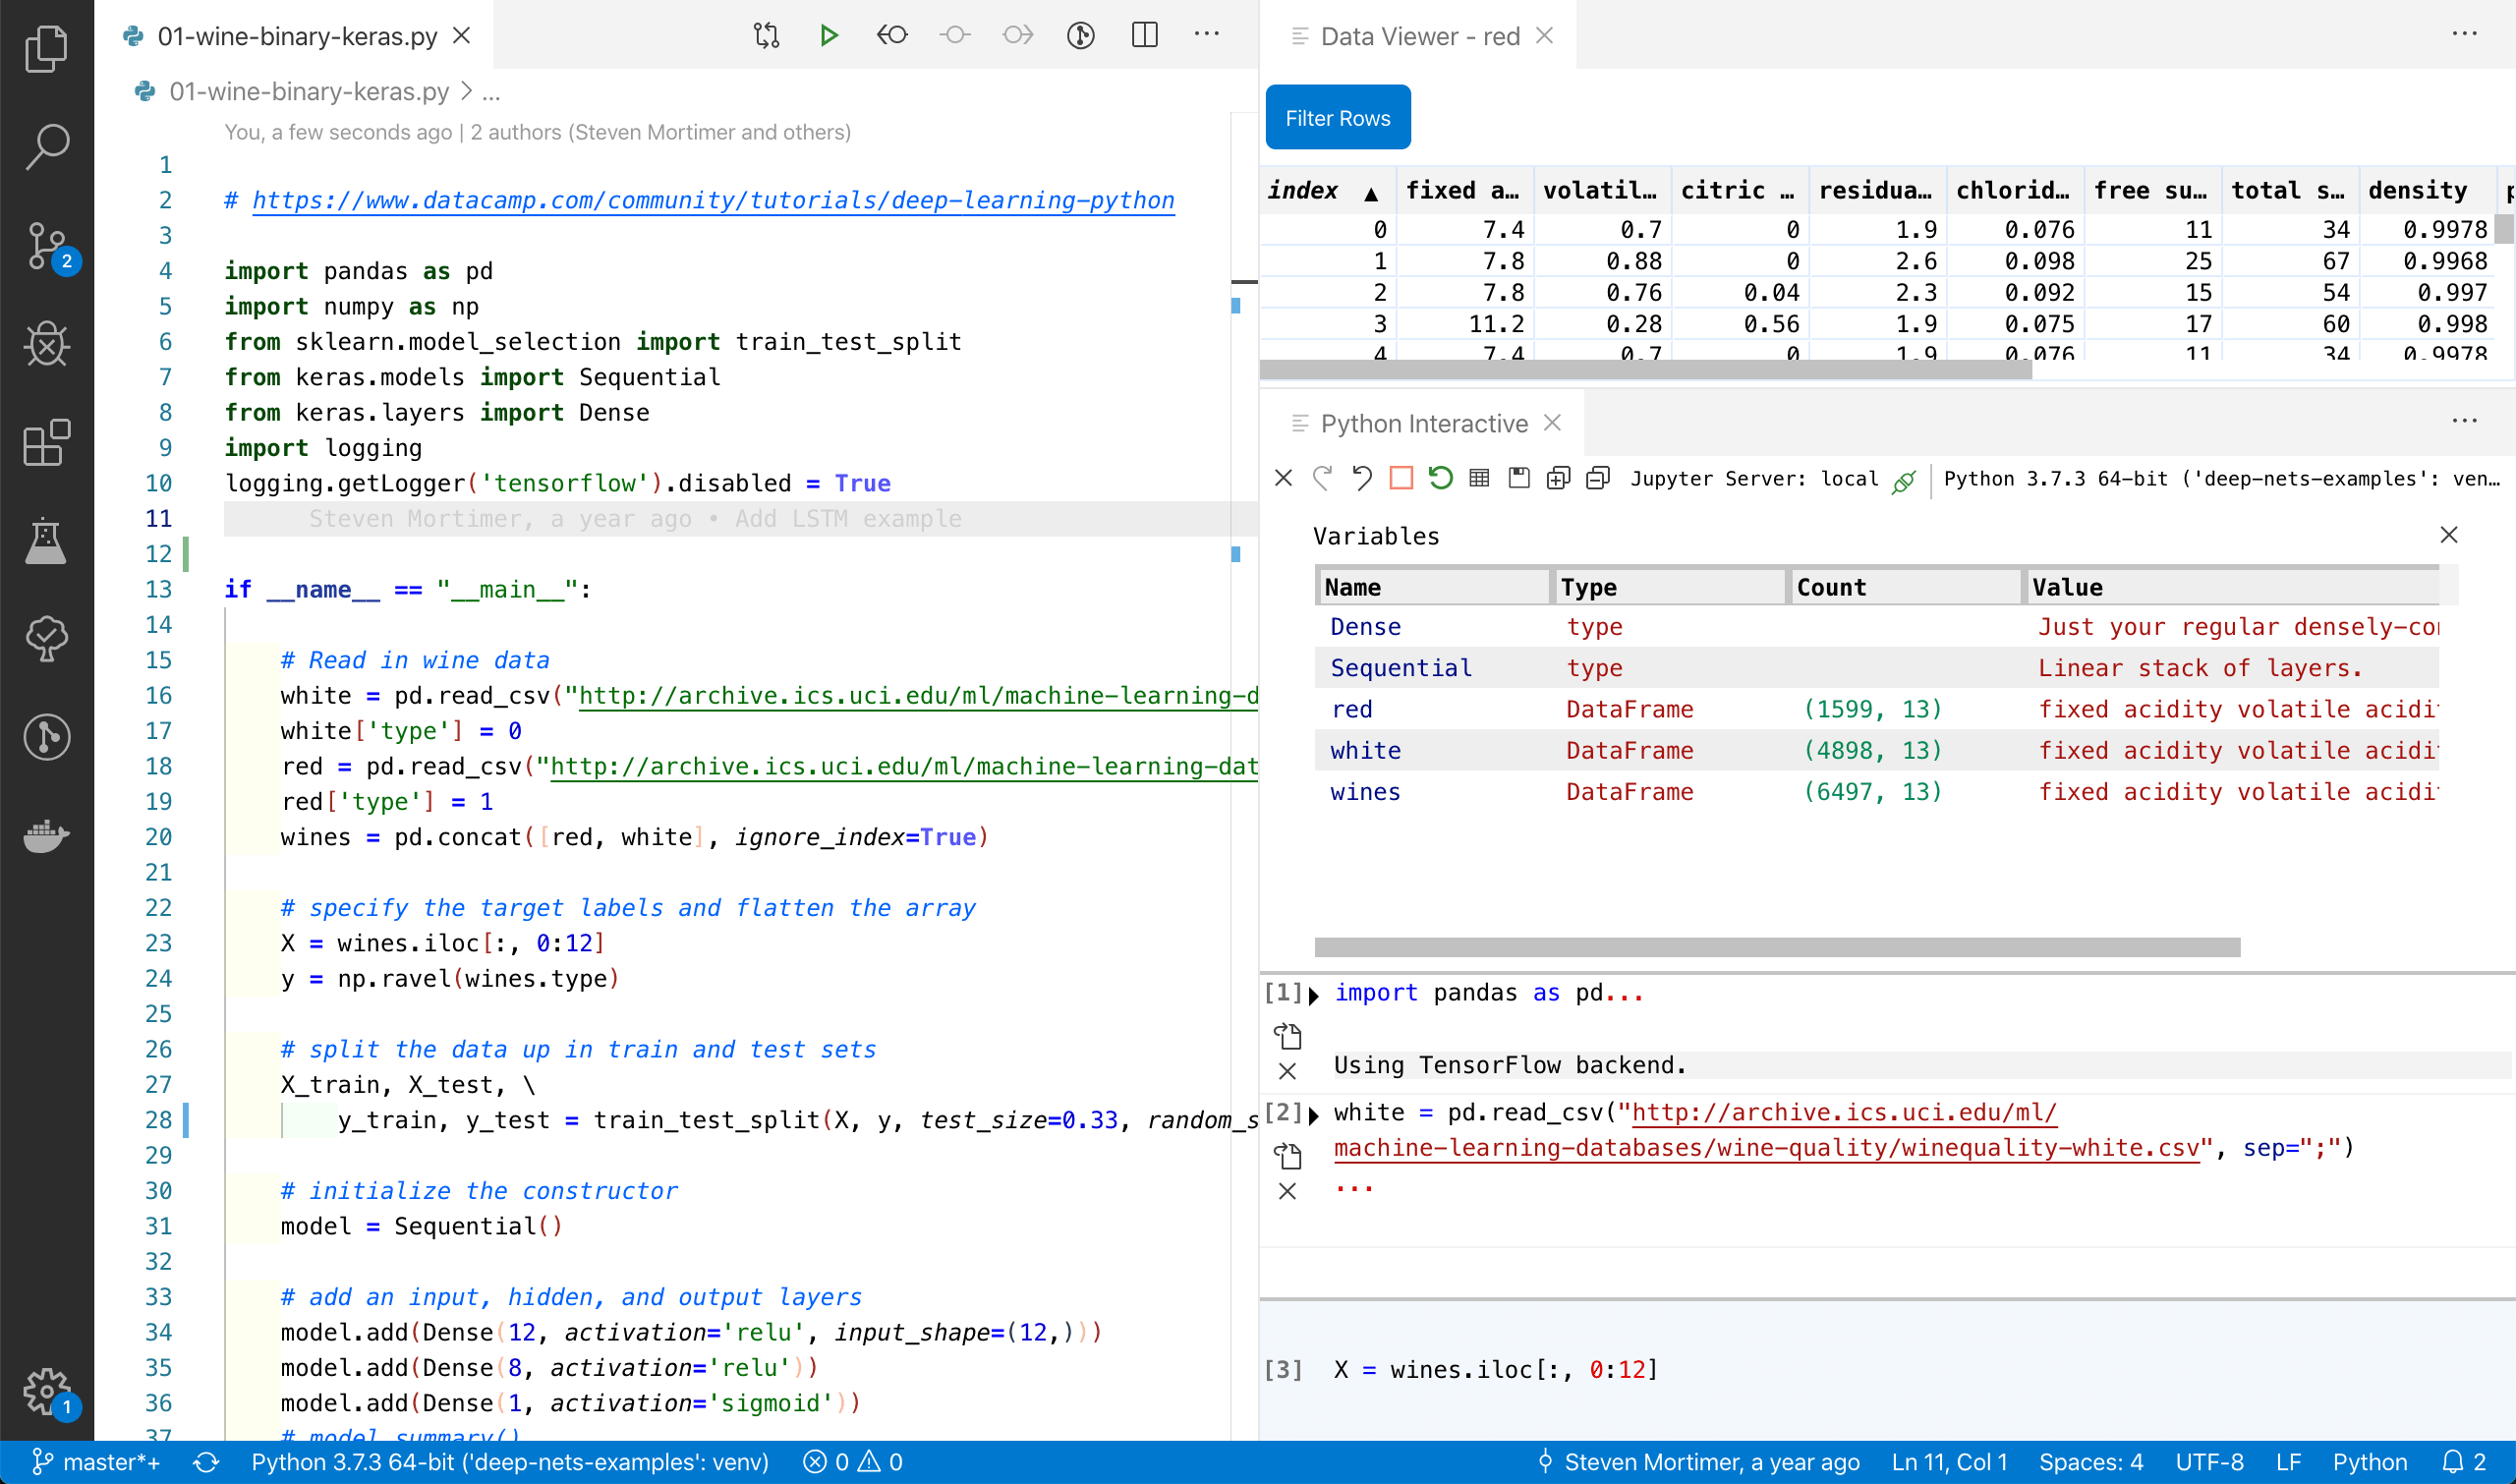
In this article I will highlight the features of VS Code that match RStudio
exactly, such as the “interactive notebook window” (called the Console in R) or
the “variable explorer” (like running View() on a data frame in RStudio). At
the bottom of this post I will provide two JSON files (settings.json and
keybindings.json) and a block of code to install from the command line a list
of extensions that I recommend. By using these files as a guide you can
configure your VS Code installation to do a pretty good job at mimicking
RStudio.
First, why try to write Python like you write R code in RStudio??
RStudio is a great all around IDE for data analysis. A few years ago I was transitioning from writing a lot of R code to more Python code at work. I initially chose PyCharm as my Python IDE for a variety of reasons outlined in another blog post of mine: An R User Chooses a Python IDE. However, as of last summer (June 2019), I switched to VS Code as a Python IDE and never looked back. In hindsight, PyCharm just seems too clunky with an over-engineered GUI of buttons to click and not really be sure what’s going on. VS Code is making great strides towards becoming an IDE that works well for the REPL (read–eval–print loop) style of coding that RStudio excels at supporting. I love how lightweight VS Code feels and how the configurations are portable via JSON files making it easier to share a common config with team members. I’ll keep writing R code in RStudio, but VS Code is quckly becoming a second home for me to write Python code.
How to Configure VS Code to run like RStudio
Aesthetics (Textmate theme and margin column ruler)
You may know that the default theme in RStudio is “Textmate”. This is found in
Tools -> Global Options -> Appearance. To get the color scheme in VS Code you
can install this with the Textmate theme extension.
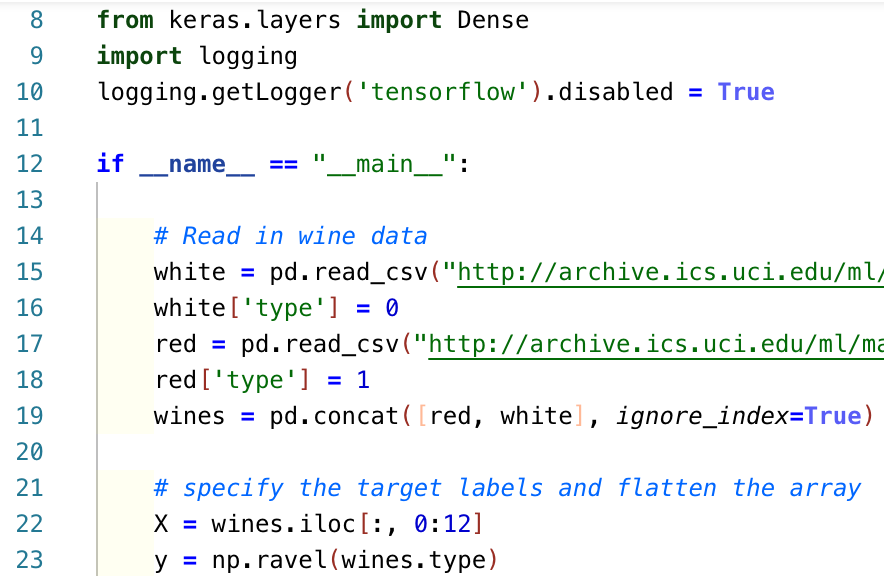
I tend to not change much beyond the default RStudio installation just so that I
don’t need to maintain a unique and unfamiliar setup compared to other
colleagues who are also using RStudio. The only customization I recommend is
adding a vertical line at 80 characters. This is a must-have feature to keep
your code readable and you can do the same with VS Code by specifying
"editor.rulers" in your user settings. More detail on how to configure that is in
the section of this post entitled Settings JSON File.
Running Code
As far as running code in RStudio, it is fairly common to write code in the
“Source” pane (normally above the console), then send the code to the “Console”
pane to run using CMD+ENTER (CRTL+ENTER if on Windows - please assume
anywhere I refer to CMD in this article it is CTRL if you use Windows). In
VS Code you can think of the Editor pane as having the exact same purpose
(writing a script), but instead of sourcing lines to the “Console” you use the same
command (CMD+ENTER) to run the code in the Python Interactive Window. More
specifically, the keyboard shortcut you need to set in VS Code is for the
command "python.datascience.execSelectionInteractive".
This is a game changer when writing Python code for analysis because you no
longer need to code in a Jupyter Notebook to execute your analysis. Simply write
your code in a .py file and press CMD+ENTER to execute line-by-line in the
Python Interactive Window. Repeat this process as you run code, explore, and
build out your analysis. Note that you can also type Python directly into the
Interactive Window just like you can type directly in R’s Console as well to
execute code.
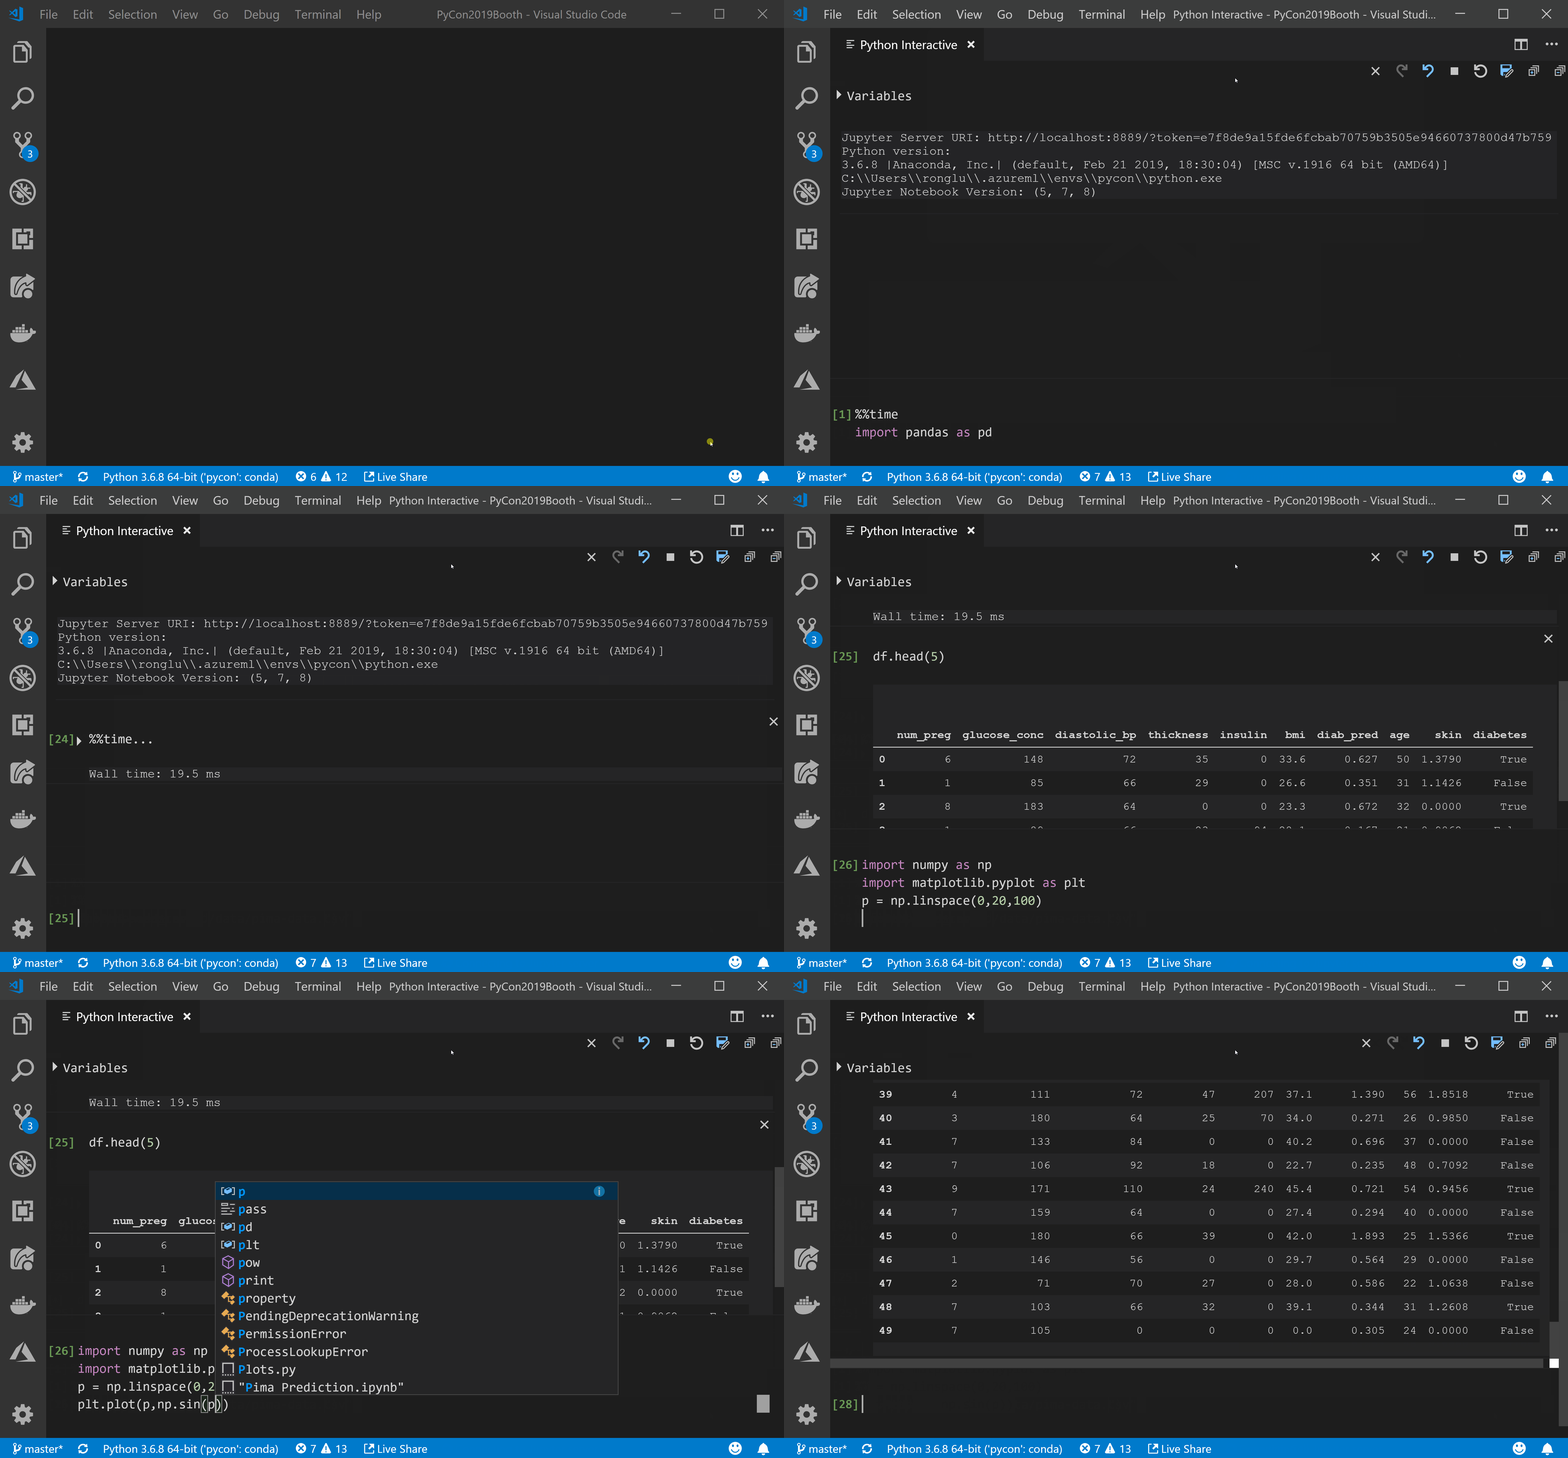
Variable Explorer (“Environment” tab in R)
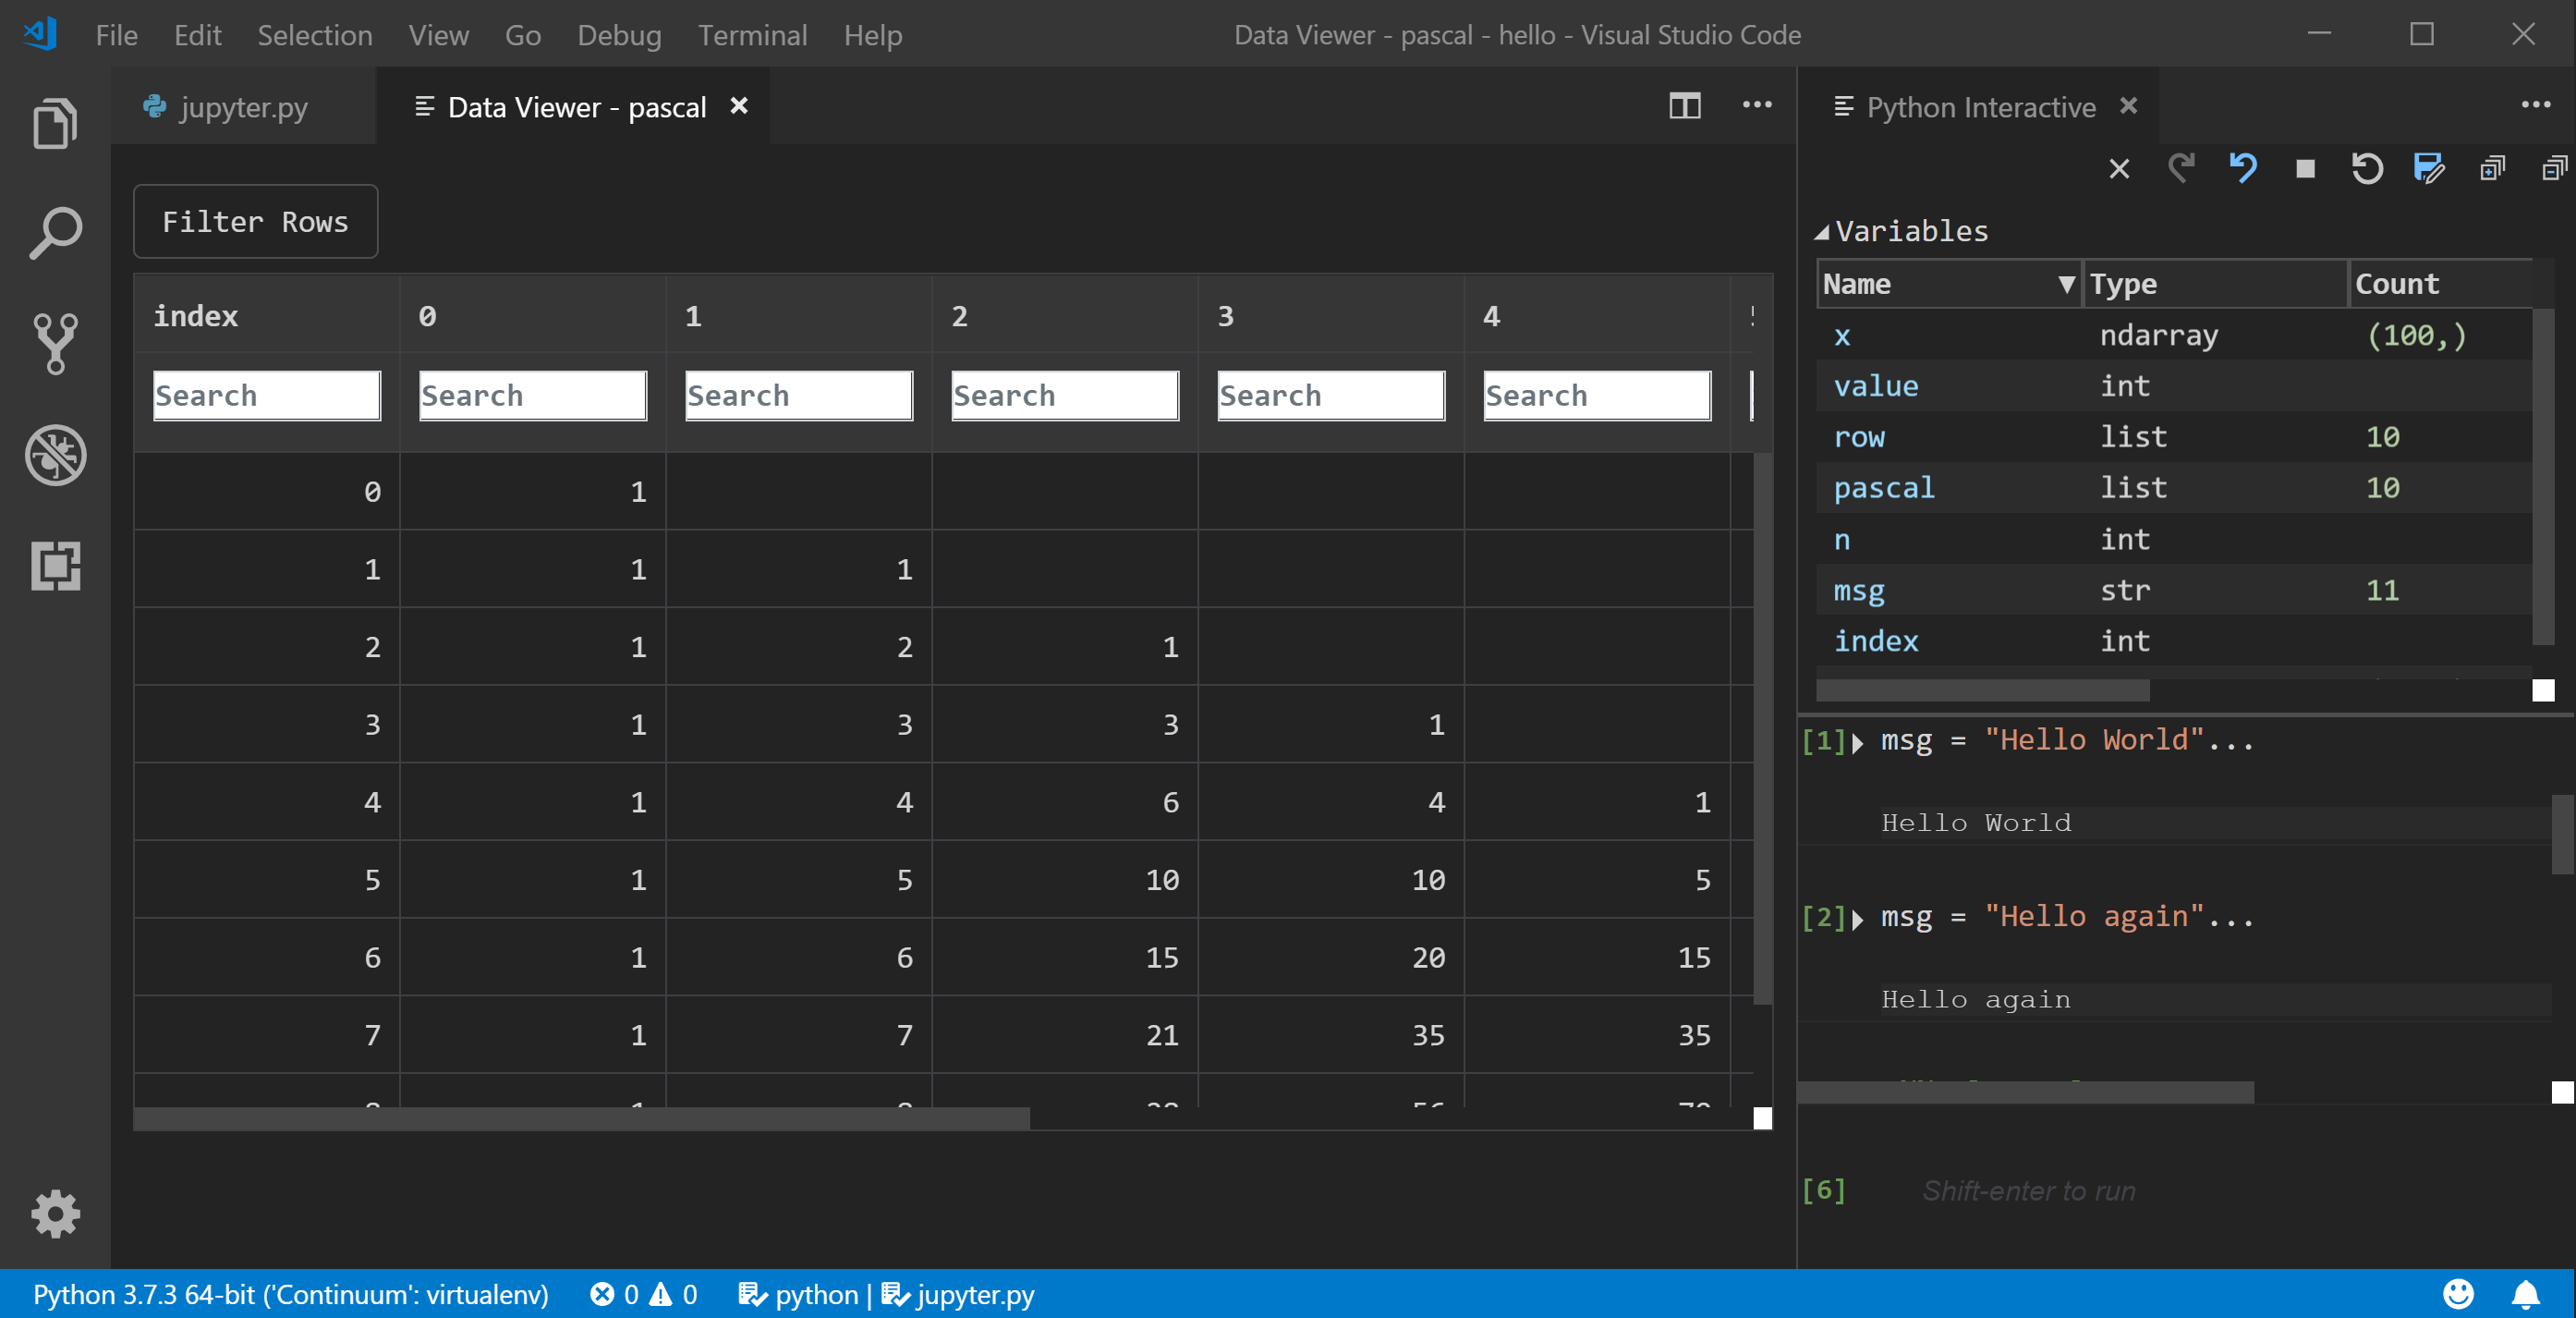
Notebooks always seem clunky in terms of executing single lines of code and reviewing variables in the global environment, but VS Code has a variable explorer just like the “Environment” tab in R.
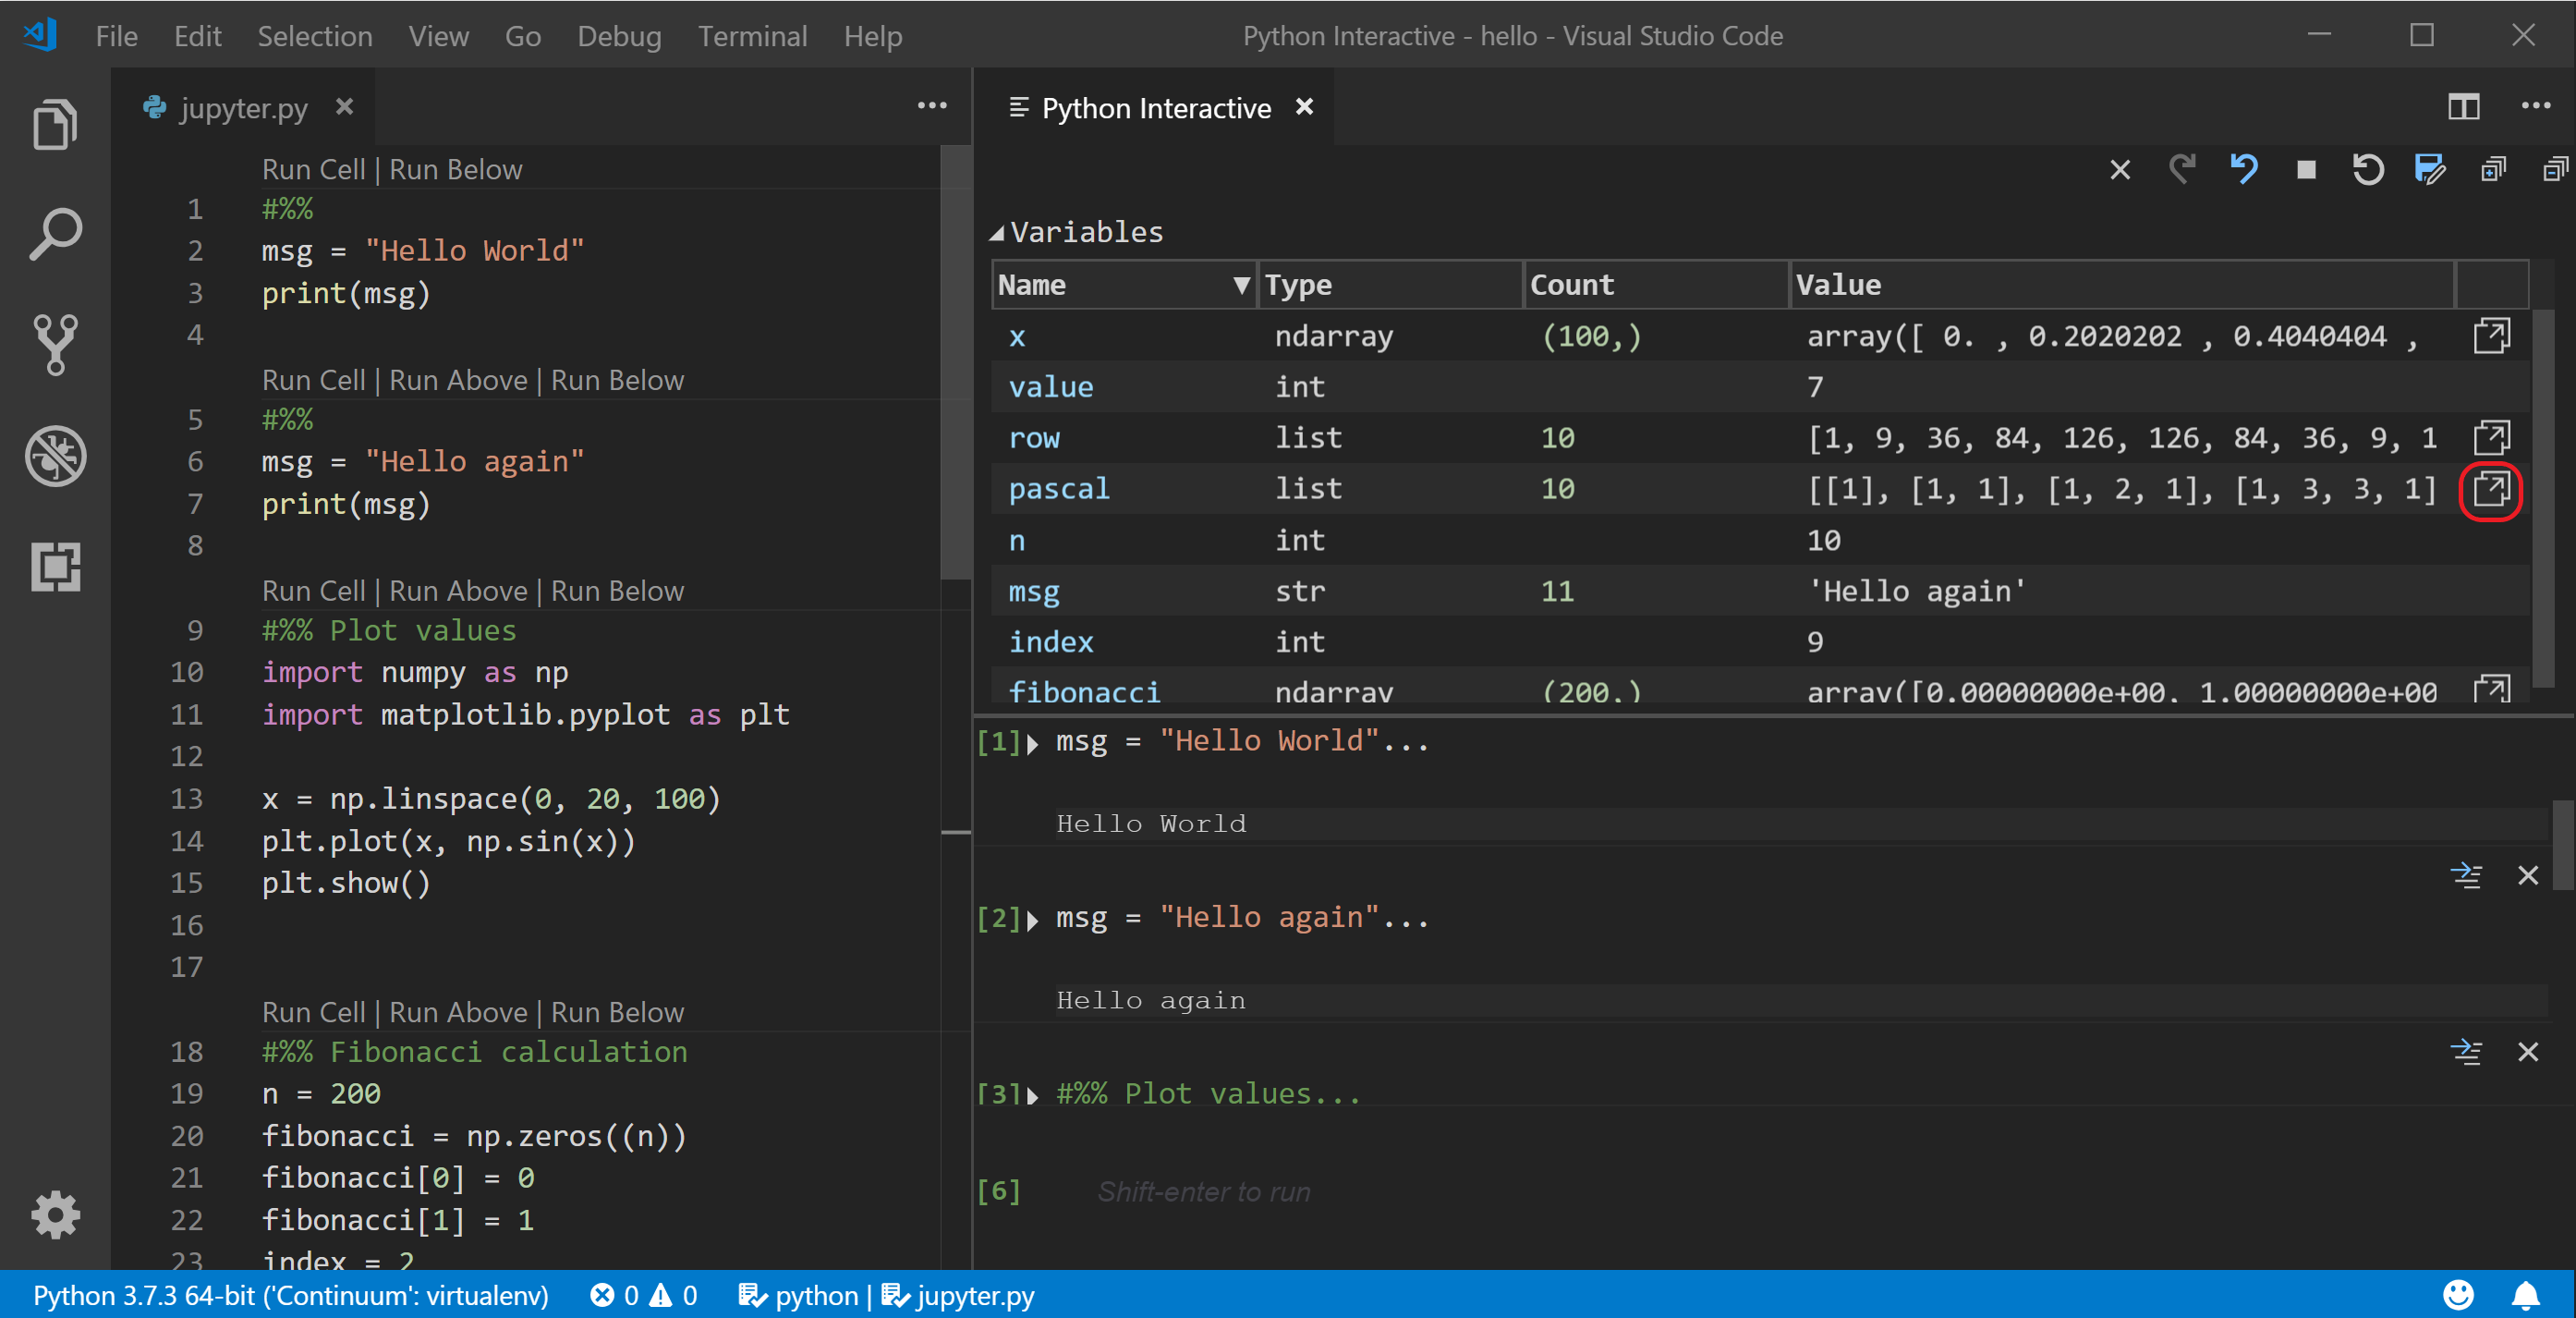
Data Viewer (Like running View() in R)
Once you’ve created a pandas DataFrame you can explore a dynamic view of the
data frame with basic filtering and sorting. I have found this be exactly like
the View() function in RStudio. The only difference is it does seem to
struggle a bit when viewing data frames over 1 million rows. It is laggy or
crashes VS Code, but I don’t find that too much of a problem because you can
always save a sample of your dataset into a variable or aggregate your data
prior to viewing.
Plot Viewer (“Plots” tab in R)
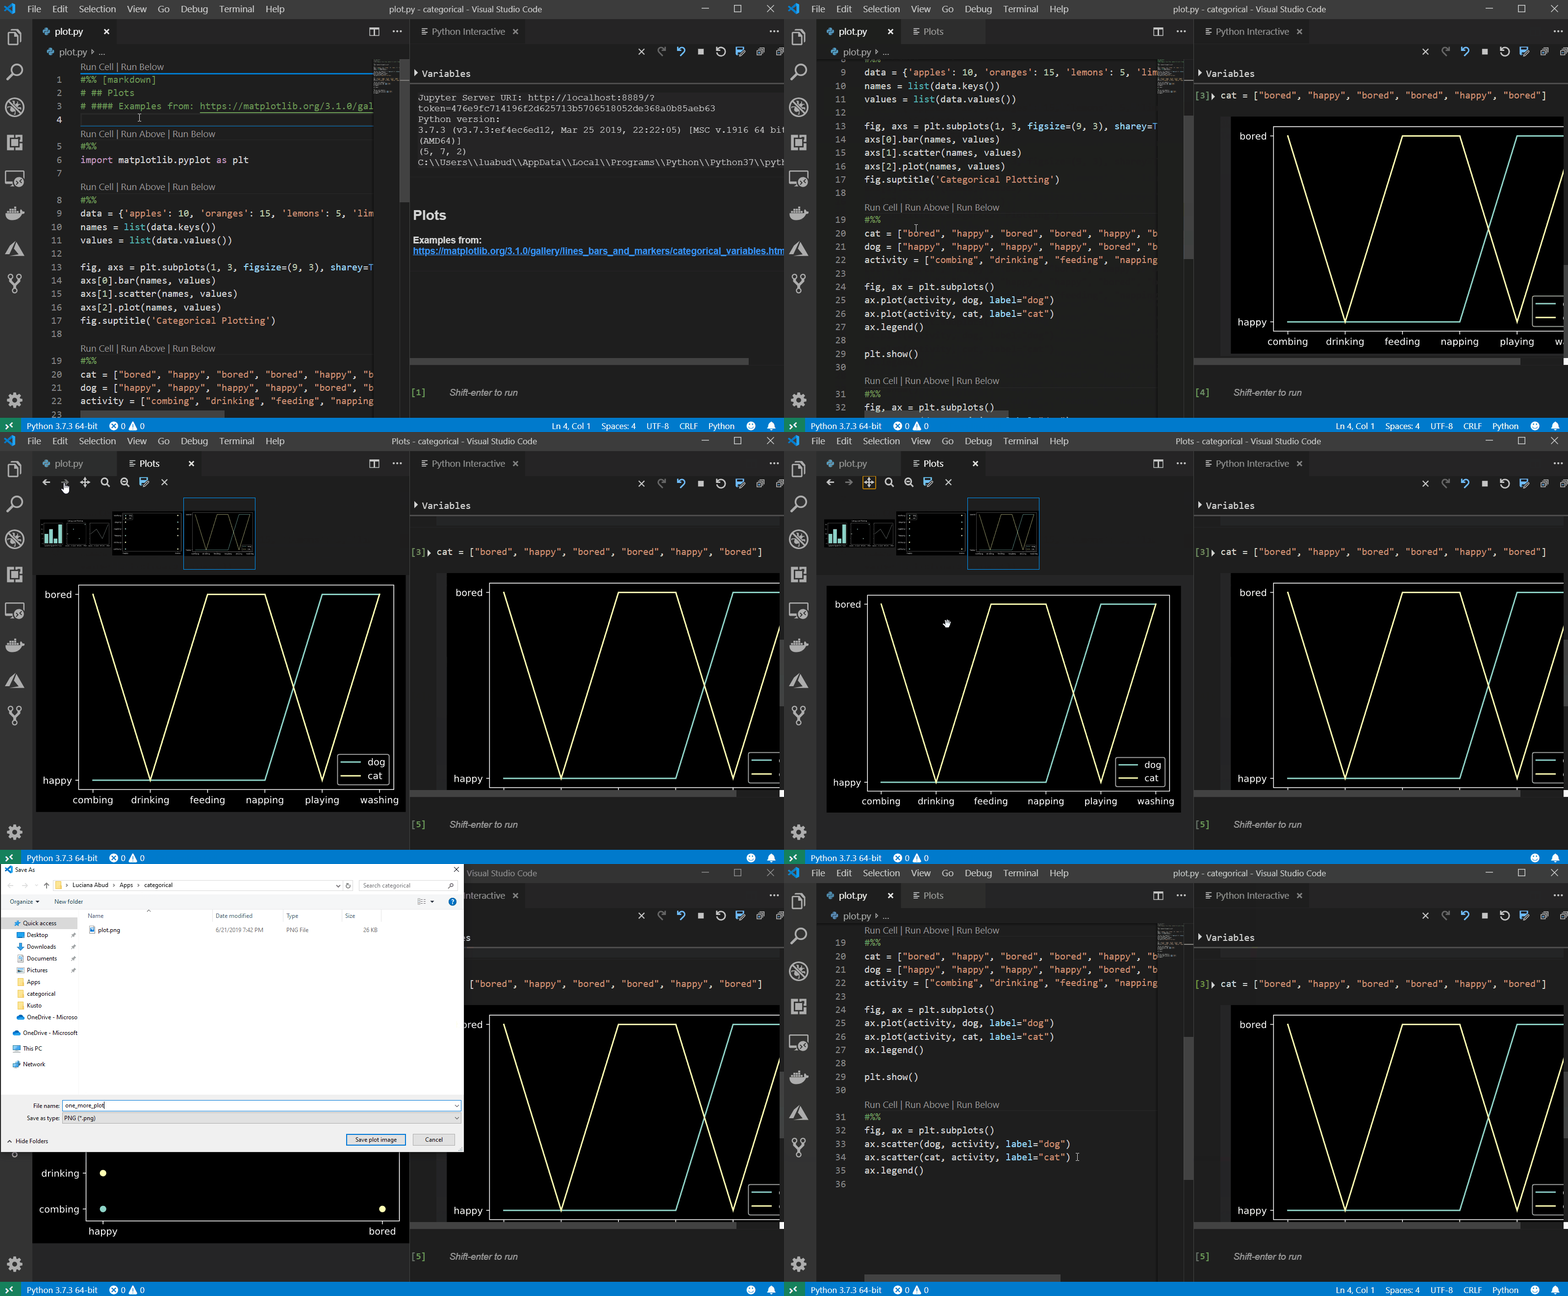
You can flip through prior plots, save them, resize, and interact with plots the same way as you would in the “Plots” pane of RStudio. Nothing different here.
Version Control (“Git” tab in R)
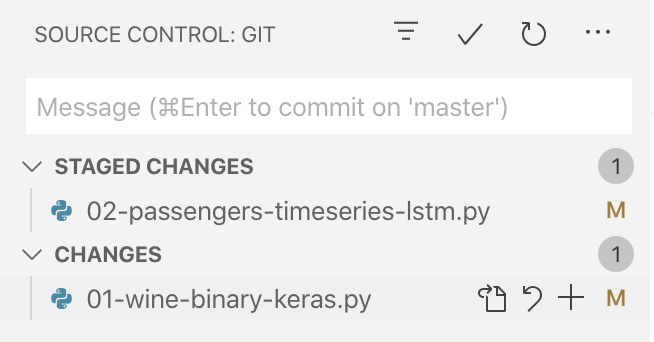
Just like RStudio you can stage files, write a commit message, and push to a git
repository. Instead of ticking a checkbox to stage files, you will have to press
the + sign, which is about the only difference. Everything else is the similar
as far as clicking on the files to see “diffs”, writing the commit message, and
pushing code to a remote repository.
All of these git features can be made even better with Eric Amodio’s GitLens extension, which I highly recommend. It makes it easier to navigate branches, see when files were changed and by whom.
What’s missing or different in VS Code?
R’s Document Outline (aka Minimap in VS Code)
RStudio creates a nice outline of your scripts based on your functions and comments that start with:
# A new section ----
code here...
This table of contents style view is helpful. As a somewhat suitable alternative I have become accustomed to annotating Python code blocks with region folding syntax which creates collapsible code sections in the VS Code editor.
# region ----

code here...

# endregion
Debugging
RStudio has a nice feature that will ask you if you want to run a piece of code with debug mode on if it initially errors. VS Code’s Python Interactive Window also prints out error messages, but will not let you debug with the click of a button. You can however set breakpoints and run your script in debug mode, which is a familiar experience, just not as seamless as RStudio.
There are obviously many other features, like having a built-in terminal, remote connections, app development via Shiny, etc. that make R/RStudio and Python/VS Code different tools, but if you’re just running analysis the two can provide very similar workflows, right down to the keyboard shortcuts. The only challenge you may have left is figuring out how to make your pandas code as legible and well organized as dplyr code… but that is for another day. (Hint: It’s possible with a strong commitment to method chaining).
Setup Files and Scripts
Settings JSON File
In order to update your settings.json file, open the Command Palette with
CMD+SHIFT+P and select "Preferences: Open Settings (JSON)" to edit the JSON
file where your settings are held. You can copy/paste the entire block of JSON
below or just individual lines.
Note: These settings files were automatically generated from my VS Code installation using Shan Khan’s Settings Sync extension.
settings.json (User Settings, as opposed to workspace/project-specific settings)
{
    "window.zoomLevel": 1,
    "explorer.confirmDelete": false,
    "explorer.confirmDragAndDrop": false,
    "files.associations": {},
    "files.autoSave": "off",
    "files.exclude": {
        "**/.git": true,
        "**/.svn": true,
        "**/.hg": true,
        "**/CVS": true,
        "**/.DS_Store": true,
        "**/.history/**": true,
        "**/History_**": true
    },
    "workbench.colorTheme": "textmate",
    "workbench.editor.enablePreview": false,
    "workbench.startupEditor": "welcomePageInEmptyWorkbench",
    "terminal.integrated.fontSize": 14,
    "terminal.integrated.cursorStyle": "line",
    "terminal.integrated.copyOnSelection": true,
    "terminal.integrated.confirmOnExit": false,
    "editor.largeFileOptimizations": false,
    "editor.suggest.shareSuggestSelections": true,
    "editor.suggestSelection": "first",
    "editor.minimap.enabled": false,
    "editor.foldingStrategy": "indentation",
    "editor.showFoldingControls": "always",
    "editor.rulers": [
        80
    ],
    "editor.formatOnSave": true,
    "python.linting.enabled": true,
    "python.linting.flake8Enabled": true,
    "python.linting.flake8Args": [
        "--ignore=E203, E266, E501, W503",
        "--max-line-length=79",
        "--select=B,C,E,F,W,T4,B9",
        "--max-complexity=18"
    ],
    "python.formatting.provider": "autopep8",
    "python.formatting.autopep8Args": [
        "--ignore=E501,E402"
    ],
    "sonarlint.rules": {
        "python:S3776": {
            "level": "off"
        }
    },
    "python.languageServer": "Microsoft",
    "python.dataScience.askForKernelRestart": false,
    "python.dataScience.runStartupCommands": "%load_ext autoreload\\n%autoreload 2",
    "python.dataScience.sendSelectionToInteractiveWindow": true,
    "python.dataScience.useNotebookEditor": false,
    "git.autofetch": true,
    "git.confirmSync": false,
    "gitlens.views.repositories.location": "gitlens",
    "gitlens.views.repositories.files.layout": "list",
    "gitlens.views.fileHistory.location": "gitlens",
    "gitlens.views.lineHistory.enabled": false,
    "gitlens.views.compare.location": "gitlens",
    "gitlens.views.search.location": "gitlens",
    "gitlens.mode.statusBar.enabled": true,
    "gitlens.mode.statusBar.alignment": "left",
    "gitlens.currentLine.enabled": false,
    "gitlens.hovers.enabled": false,
    "vsintellicode.modify.editor.suggestSelection": "automaticallyOverrodeDefaultValue",
    "tabnine.experimentalAutoImports": true,
    "indentRainbow.errorColor": "rgba(255,255,255,0.0)",
    "todo-tree.tree.flat": true,
    "todo-tree.highlights.defaultHighlight": {
        "type": "text-and-comment",
        "foreground": "grey"
    },
    "better-comments.tags": [
        {
            "tag": "?",
            "color": "#8f5785",
            "strikethrough": false,
            "backgroundColor": "transparent"
        }
        {
            "tag": "*",
            "color": "#69a800",
            "strikethrough": false,
            "backgroundColor": "transparent"
        }
    ],
    "bracket-pair-colorizer-2.colors": [
        "#992e24",
        "#ffb997",
        "#263859"
    ],
    "cSpell.userWords": [
        "YYYYMMDD",
        "groupby",
        "idxmax",
        "inplace",
        "itertools",
        "multindex",
        "rfind",
        "strptime"
    ]
}
Keyboard Shortcuts JSON File
Updating the keyboard shortcuts JSON file is similar to editing settings.json.
Open the Command Palette with CMD+SHIFT+P and select "Preferences: Open Keyboard Shortcuts (JSON)" to edit the JSON file where your settings are held.
You can copy/paste the entire block of JSON below or just individual lines.
In addition to setting the keyboard shortcut CMD+ENTER to execute lines in the
Interactive Window I have set a few other two keyboard shortcuts to work exactly
like RStudio. For example, clearing the console and restarting the R session:
CRTL+L- “Clear Console” (in RStudio) => Clear Cells (in Python Interactive Window)CMD+SHIFT+F10- “Restart R” (in RStudio) => Restart Kernel (in Python Interactive Window)
Of course there are other shortcuts that you can configure like R’s block
comment command (Code -> Comment/Uncomment Lines) (CMD+SHIFT+C). Simply set
the VS Code command "editor.action.commentLine" to that shortcut.
Another example is R’s command (Code -> Reflow Comment) which hard wraps code
to 80 characters using CMD+SHIFT+/. VS Code can do the same after installing
the extension called “rewrap” and then giving its command
"rewrap.rewrapComment" the same keyboard shortcut. It is really up to you to
configure the shortcuts that you use most often.
keybindings.json
// Place your key bindings in this file to override the defaultsauto[]
[
    {
        "key": "cmd+enter",
        "command": "python.datascience.execSelectionInteractive",
        "when": "editorTextFocus && python.datascience.featureenabled && python.datascience.ownsSelection && !findInputFocussed && !notebookEditorFocused && !replaceInputFocussed && editorLangId == 'python'"
    },
    {
        "key": "shift+enter",
        "command": "-python.datascience.execSelectionInteractive",
        "when": "editorTextFocus && python.datascience.featureenabled && python.datascience.ownsSelection && !findInputFocussed && !notebookEditorFocused && !replaceInputFocussed && editorLangId == 'python'"
    },
    {
        "key": "cmd+enter",
        "command": "python.datascience.runcurrentcell",
        "when": "editorTextFocus && python.datascience.featureenabled && python.datascience.hascodecells && !editorHasSelection && !notebookEditorFocused"
    },
    {
        "key": "ctrl+enter",
        "command": "-python.datascience.runcurrentcell",
        "when": "editorTextFocus && python.datascience.featureenabled && python.datascience.hascodecells && !editorHasSelection && !notebookEditorFocused"
    },
    {
        "key": "cmd+enter",
        "command": "notebook.cell.executeAndSelectBelow",
        "when": "notebookEditorFocused && activeEditor == 'workbench.editor.notebook'"
    },
    {
        "key": "shift+enter",
        "command": "-notebook.cell.executeAndSelectBelow",
        "when": "notebookEditorFocused && activeEditor == 'workbench.editor.notebook'"
    },
    {
        "key": "ctrl+l",
        "command": "python.datascience.removeallcells",
        "when": "python.datascience.featureenabled && !terminalFocus"
    },
    {
        "key": "ctrl+l",
        "command": "workbench.action.terminal.clear",
        "when": "terminalFocus"
    },
    {
        "key": "cmd+shift+f10",
        "command": "python.datascience.restartkernel"
    },
    {
        "key": "cmd+shift+c",
        "command": "editor.action.commentLine",
        "when": "editorTextFocus && !editorReadonly"
    },
    {
        "key": "cmd+/",
        "command": "-editor.action.commentLine",
        "when": "editorTextFocus && !editorReadonly"
    },
    {
        "key": "cmd+i",
        "command": "python.datascience.showhistorypane"
    },
    {
        "key": "ctrl+shift+/",
        "command": "rewrap.rewrapComment",
        "when": "editorTextFocus"
    },
    {
        "key": "alt+q",
        "command": "-rewrap.rewrapComment",
        "when": "editorTextFocus"
    },
    {
        "key": "ctrl+shift+s",
        "command": "extension.updateSettings"
    },
    {
        "key": "shift+alt+u",
        "command": "-extension.updateSettings"
    }
]
Extensions Installation Script
You can run each of the lines below in your Terminal or other Command Prompt
after installing VS Code in order to install the extensions. NOTE: This does
require having the code command in your PATH. On Mac use the following instructions
to install ‘code’ command in PATH: https://code.visualstudio.com/docs/setup/mac#_launching-from-the-command-line.
Alternatively, you can search for extensions in the VS Code Marketplace and install
from there (more detail is available here:
https://code.visualstudio.com/docs/editor/extension-gallery#_browse-for-extensions).
# editor visual aids
code --install-extension CoenraadS.bracket-pair-colorizer-2
code --install-extension oderwat.indent-rainbow
code --install-extension gerane.Theme-textmate

# development aids
code --install-extension eamodio.gitlens
code --install-extension aaron-bond.better-comments
code --install-extension Gruntfuggly.todo-tree
code --install-extension mikestead.dotenv
code --install-extension streetsidesoftware.code-spell-checker

# code formatting
code --install-extension ms-python.python
code --install-extension VisualStudioExptTeam.vscodeintellicode
code --install-extension TabNine.tabnine-vscode
code --install-extension christian-kohler.path-intellisense
code --install-extension stkb.rewrap
code --install-extension SonarSource.sonarlint-vscode

# file viewer tools
code --install-extension DotJoshJohnson.xml
code --install-extension jithurjacob.nbpreviewer
code --install-extension GrapeCity.gc-excelviewer

# remote development tools
code --install-extension ms-azuretools.vscode-docker
code --install-extension ms-vscode-remote.remote-containers
code --install-extension ms-vscode-remote.remote-ssh
code --install-extension ms-vscode-remote.remote-ssh-edit
code --install-extension ms-vscode-remote.remote-wsl
code --install-extension ms-vscode-remote.vscode-remote-extensionpack

# tool to save your settings as a gist
code --install-extension Shan.code-settings-sync